
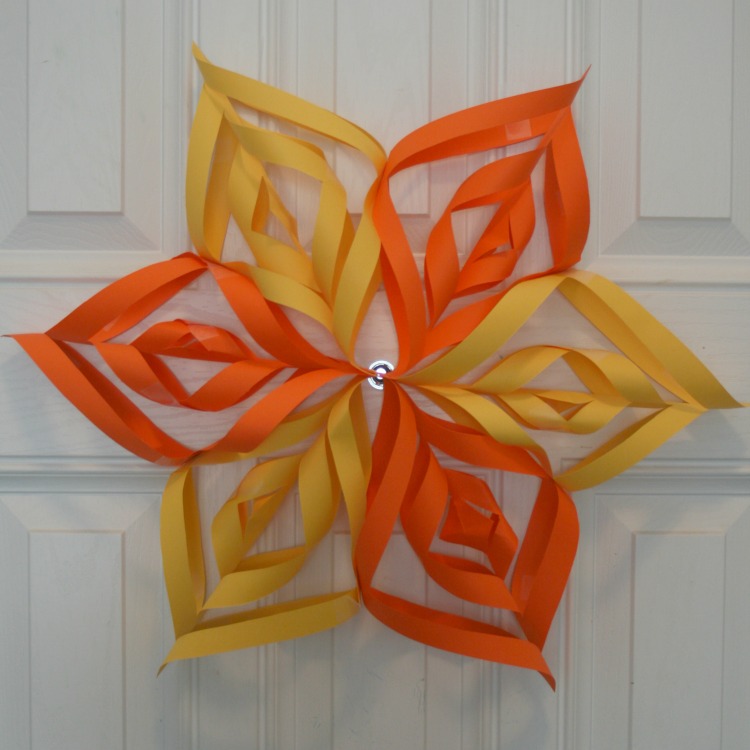
Easy DIY Fall Craft Decoration Even Moms Who Suck at Crafts Can Make With Their Kids
The Intentional Mom Planning System is where you need to start with our incredible collection of product options. It will help you establish the basics for your life & home so you’ll finally have a plan, save yourself time, and go to bed feeling like you accomplished something every day (because you did). Save up to 60% HERE!
*This is a guest post by my oldest daughter, Music Girl
Are you looking for easy and fun crafts to make for fall that both you and your kids will enjoy? Do you need something festive that makes your home look and feel like fall?Look no further!
Throughout the month of September, I will show you three easy and frugal crafts to make to bring the spirit of fall into your home. Today I am going to show you how to make a wreath in fall colors that will look great on doors inside your home or even on a wall.
The amazing thing is that even I can make this craft…and I stick at crafts! This is why my daughter came up with this one 😉
This is a DIY fall decoration craft that even moms who suck at crafts can make with their kids.

(this post may contain affiliate links. If you make a purchase, I may receive a small commission at no cost to you)
For this craft you will need:
-6 sheets of card stock in whatever fall colors you want (you could use construction paper if you wanted but I strongly recommend card stock for durability reasons)
We like this paper, just click on it!

![]()
-Tape (you could make this without tape and use staples instead, but I think it looks better with tape – it’s totally personal preference!)
-scissors
-a stapler (yes you do need this even if you are using tape)
-fishing line or tape to hold it up – I use tape for my door because my mom doesn’t want to put a hole in the door to using fishing line…
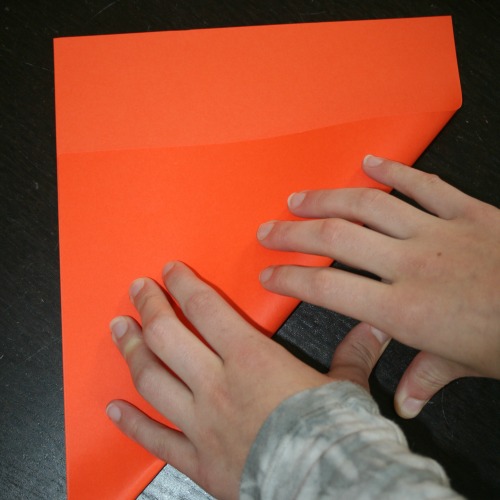
The first thing you need to do is make the card stock into a square
To do this, you first fold one of the top corners diagonally across the page until the bottom corner underneath the one you folded is split in half. It should look like this folded:
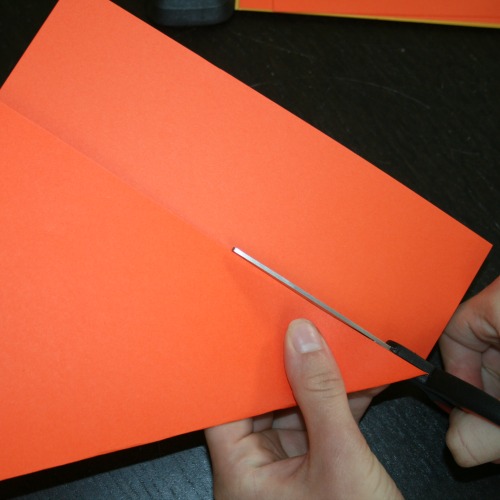
Then, cut off that strip parallel to the edge of your fold so you’re just left with a folded triangle
Or, you will have a square if you were to open it up.
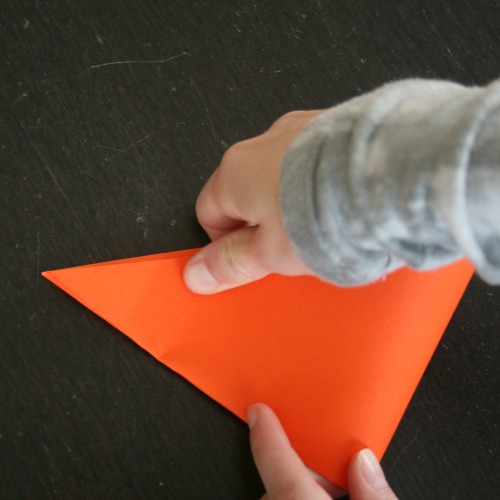
Next, you want to fold the triangle in on itself to make a smaller triangle
Do this by grabbing one of the corners on the longest side of the triangle and fold it to meet the other edge of the side. It should look like this:
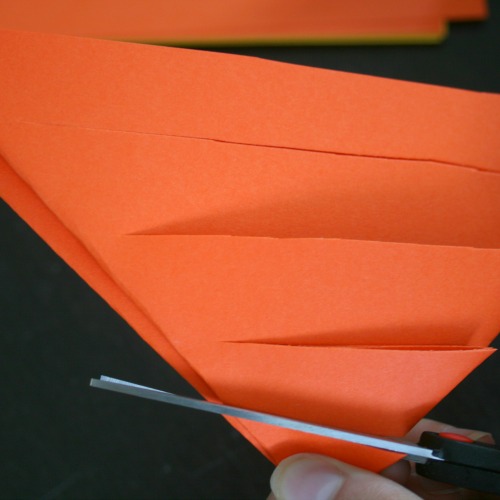
Get ready to cut
After you’ve done that, take your scissors, and hold your triangle so the side that has been folded twice (the line you folded over the second time) is at the bottom.
Then, carefully cut four straight lines across the triangle parallel to the diagonal side, starting at the bottom, and be careful not to cut all the way through the triangle, but leave around 1/4” uncut.
When you have finished this step, you will have divided the triangle into five approximately equal pieces, about 3/4” in size, with your cuts. It should look like this:
Now, unfold your triangle completely
Lay it on a flat surface so that it looks like a diamond with the two triangles in the middle pointing to the sides.
Now the fun part starts!
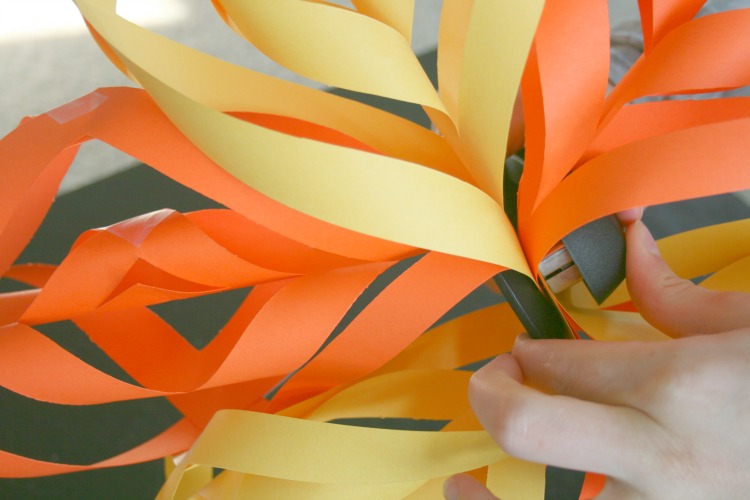
Grab your tape
Grab the innermost pointed strips on either side of the little triangles, and gently bend them up so the points meet in the middle. It should look kind of like an (x) over top of the triangles. Put a piece of tape or a staple to hold them together. It should look like this:

Repeat
Now, flip your diamond over so the “tube” you just created is on the bottom against the flat surface. Don’t push on it!
Now, repeat the same thing you just did: grab the innermost strips, bend them up and around, and fasten them.
Do that two more times, continuing to flip you diamond from one side to the other.
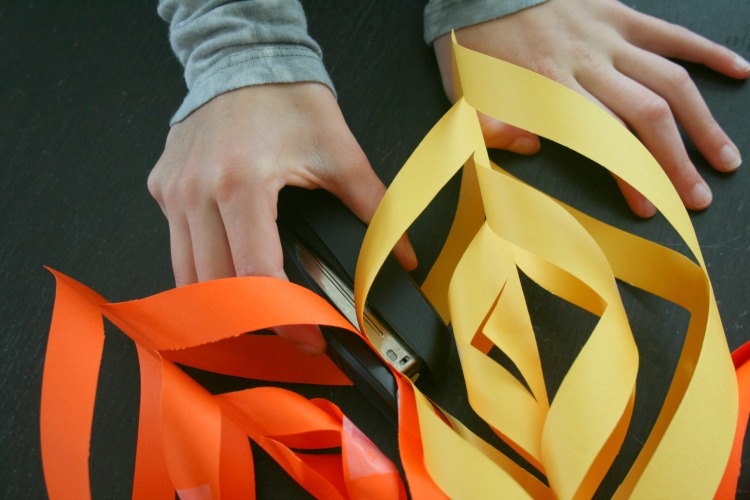
When you are finished you will have a total of four tubes increasing in size. It should look like this:

Do this with all your papers
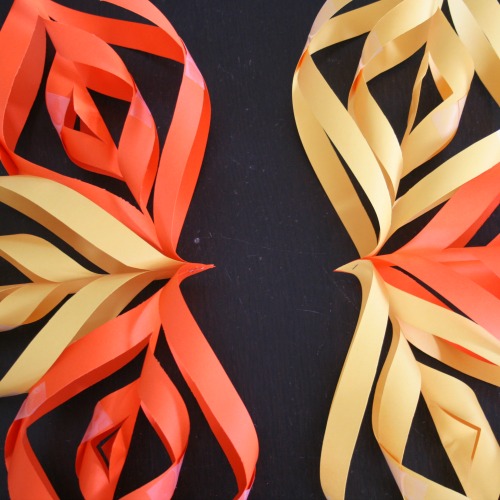
Repeat the same process, using your various colors as you wish as many more times as you want “arms” on your wreath. I made mine with six arms, but you can make them with more or less if you want! It’s up to you!
Obviously, you may need more or less paper if you make it with a different number of arms. (If you do make a wreath with a different number of arms, send us a picture! I’m curious to see what it looks like!)
Get ready to assemble
Ok, once you have all your arms made, it’s time to put the wreath together! This can be done in a variety of ways, but this is the way I found is easiest and produces the best results.
For instance, let’s say you made a wreath with six arms.
You are going to put it together first in 2 groups of 3 and then put those together. (You may need to adjust these numbers if you have more or less arms.)
Grab an arm by one of the ends, and grab another arm by an end. Pinch the ends together, with the tips pointing the same way, and secure them with a staple. Hold the double-arm by the end you just stapled and staple on the third arm in the same way.

Repeat the process for the other three arms, and you should have two triple-arms. It should look like this:
Complete the entire wreath
Then, grab both halves of the wreath and put the stapled ends together. Pinch them and adjust as necessary to make sure they are evenly spaced. Then get in there with your stapler and secure them! I always put an extra staple in there just to be sure it stays together.
One more stapling step
Locate on any one of the arms one of the two outermost tubes, at the center of the x where they make an x. Locate the one on the arm next to it as well. You want to staple those together so it’s secure. Do that all the way around the wreath until all the arms are stapled securely to both neighbors. Look at the picture for help if you need it.
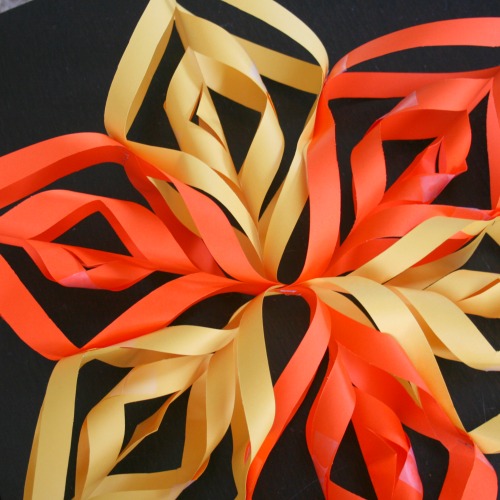
The only thing left to do is hang it up and enjoy it!
I hope this wreath is a fun and easy project for you and your kids to make to decorate for fall. But, with different colors, this wreath could be used to decorate for any season or holiday! It’s a great gift idea for Christmas-take it from me who has personal experience doing this. 🙂
Be sure to watch for the next fall craft post-I’m planning on putting it up next week.


These are so fun! I want to do some for Christmas with white paper…and probably add some glitter☺️! I’ve never seen a tutorial for these, so thank you – it looks doable!!
Yes! We make these for all seasons just using colors that are relevant to whatever season it is! So fun!