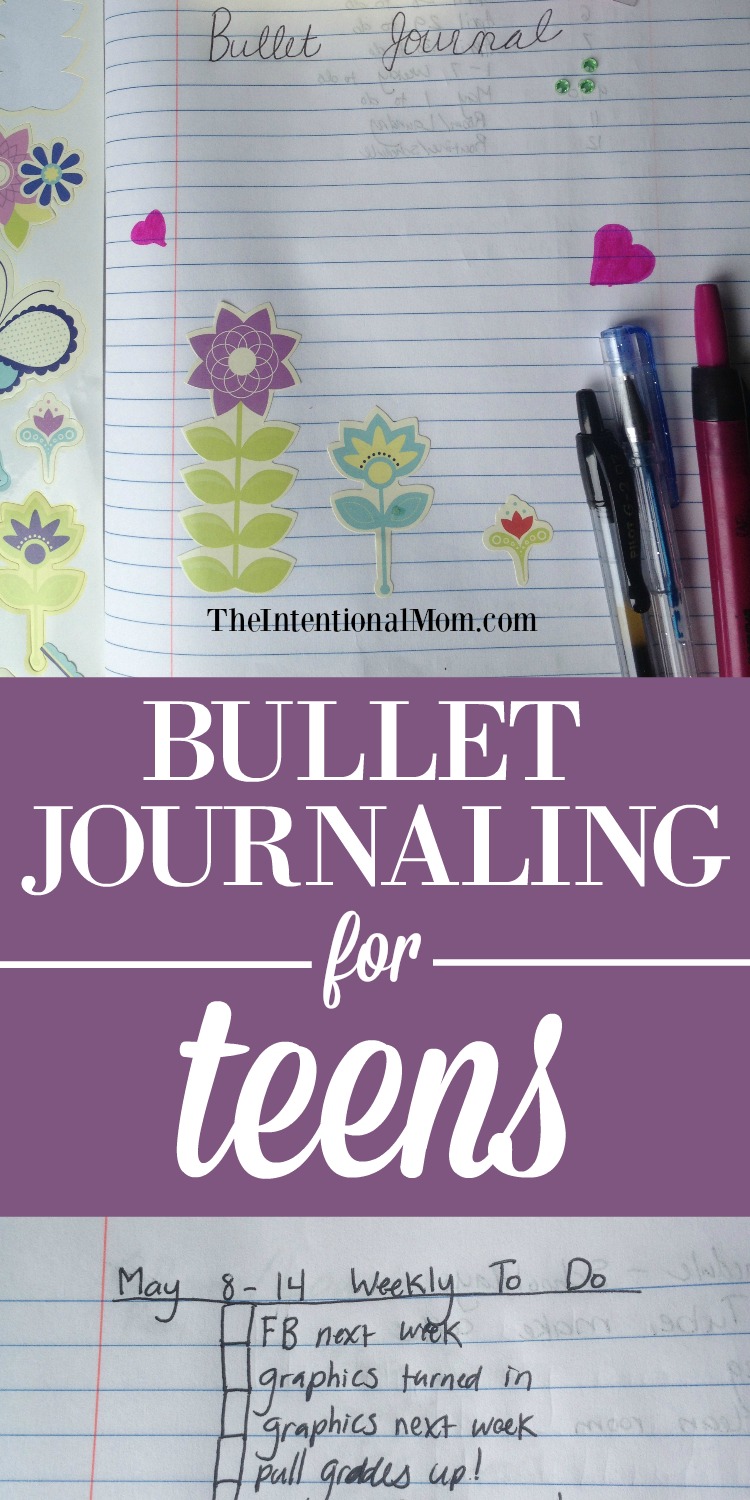
Bullet Journaling For Teens (written by a teen)
The Intentional Mom Planning System is where you need to start with our incredible collection of product options. It will help you establish the basics for your life & home so you’ll finally have a plan, save yourself time, and go to bed feeling like you accomplished something every day (because you did). Save up to 60% HERE!
Have you ever tried bullet journaling? Maybe you’ve heard of it, but never tried it because you didn’t know how. Maybe you’ve tried it before, but you’ve never gotten it to work. Or, maybe you’ve never heard of it at all. Well, whatever the case, you’re in luck, because I’m going to show you how to do it, using examples from my own bullet journal. Even if you’re not a teen, you will fall in love with bullet journaling.
Here is the bullet journaling 101 course you’ve been looking for.
(this post may contain affiliate links. If you make a purchase, I may receive a small commission at no cost to you)
So what is a bullet journal, anyway?
Quite simply, a bullet journal is an easy way to keep yourself organized. It’s kind of like a calendar, to-do list, scrapbook, and notepad, all in one. And, it’s super simple. All you have to do is set it up, and then use it!
How do I set one up?
Glad you asked. I’ve been itching to get this part started. 🙂 Let’s get into it.
First things first, you’ll need two things:
- number one, a notebook.
- number two, a pen or pencil.
Now, there is fancy stuff out there specifically for bullet journaling, but it’s about five times as expensive and it really doesn’t make a difference. I’ve never owned anything special for bullet journaling, and mine works just fine.
Some other things that do make it easier and a little more fun to bullet journal are:
- a ruler
- different colored things to write with
- little stickers to put on the pages
I also recommend:
- page flags of some kind to be able to get to various pages quicker. You’ll see what I mean in a few minutes
Now, let’s move on
Ok. Here is a bullet journaling term for you (I’m sure it’s used other places as well, but I learned it while learning to bullet journal)…
A spread is two pages right next to each other. So it’s when you open a notebook and you have a page on the right and a page on the left. That’s a spread.
Now that we’ve defined a spread, flip your notebook open to the first spread. It’s time to get started with creating your bullet journal.
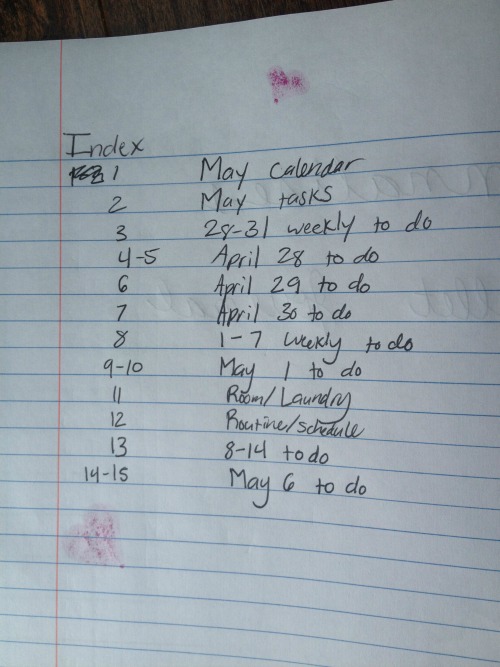
Step one: index
This first spread is going to be the index. This is a very important spread. It’s going to help you keep track of which page is which. Mark it as the Index.
Next, turn the page.
Step two: monthly spread
This is going to be your monthly spread. Take the current month you are in (May for me since it’s May at the time of this writing) unless it’s like a few days until the next month. In that case, you can do the upcoming month.
To start, put the name of the month at the top. You can make it look however you want. That’s one of the things I love about bullet journals: they’re very customizable.
Now, down the side of the page, put all the numbers for the days in the month (so for May it’s 1-31) in a column.
Next to that column, put the first letter of the day of the week it is. So, May for me starts on a Monday, so next to May 1 there is an M.
Then, once you have those two columns done, put any important dates you need to remember in to the appropriate days. You don’t need to get super specific here- that’s for the weekly spread and daily spread.
For now, just put the big things you can’t afford to forget.
Once you finish all that, mark the page as page 1, in the lower left hand corner.
Lastly, mark in your index that page 1 is the May monthly.
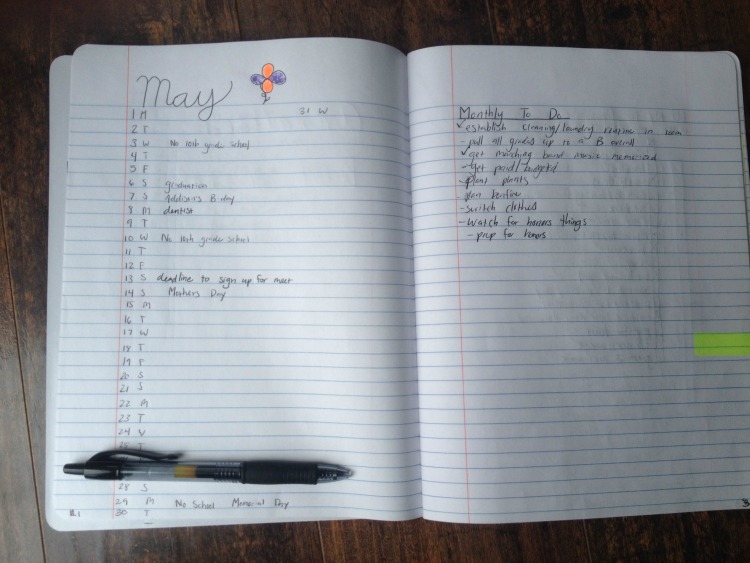
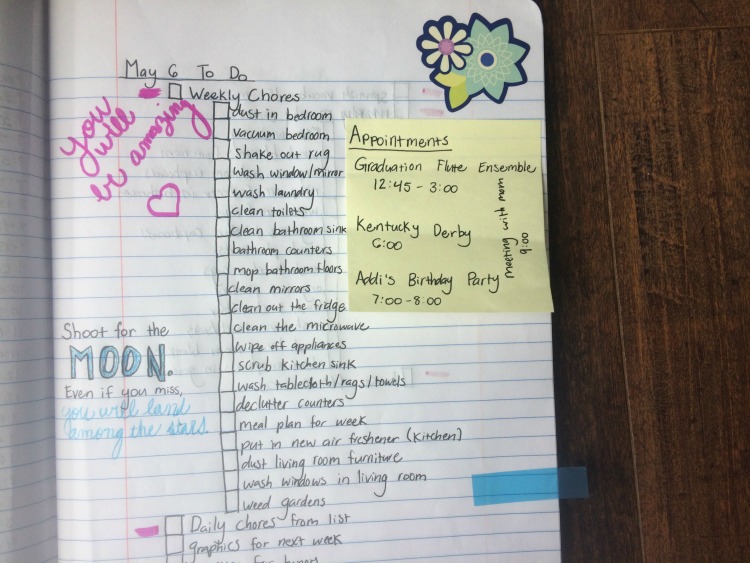
Step three: monthly goals
On the opposite page as your May monthly is your May goals list. Basically, here you list all the things you want to achieve by the end of May. It’s up to you how much you put down, and how big or small they are. Once you’re done marking, put that as page 2 and put it in your index.
Once you’re done marking, put that as page 2 and put it in your index.
Be sure to note the right page of the above picture. Labeled “monthly to-do,” these are my goals for the month.
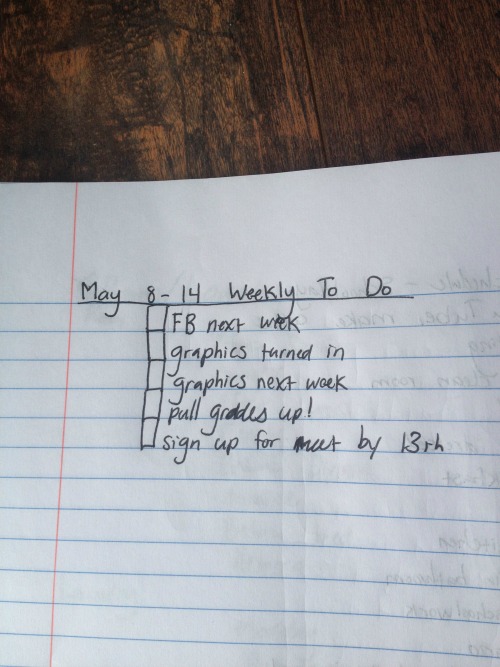
Step four: weekly page
Next is your weekly page. This usually takes up one page, but it could take up two depending on what you do with it. And as you bullet journal more and more you’ll kind of tweak all of this to be what you need it to be.
Either way, this is where you would write down the goals and things you want to achieve by the end of the week (make sure you consult the monthly goals and are taking some from there).
You would also write the dates that you have places to go, or things to do at a certain time (like I meet with my mom every night at 9 to talk about stuff I’m in charge of around the house) and things like that.
You obviously will make a new one every week, but you don’t have to do that all now. Just focus on the current week, one at a time.
Once you are all done, mark that as page 3 and put it in the index.
Step five: daily page
Next is your daily page. You make a new one every day, and it’s basically the to-do list for the day.
Pull tasks from your weekly spread, and also anything else you think of that you have to do that day. Mine usually take up two pages each, but it might take up less.
Once you’re done writing everything down, mark it as page 4 and put it in your index (if you have more than four pages filled out after the index, mark them as they should be and ignore my numbers. You’ll see that in my bullet journal I have other things in there too which messes with the page numbers a little. The important thing is that you know where everything is and that it’s all recorded in the index for future reference).
I recommend putting a page flag here so you know where the page is with all the tasks you have to do that day. But it’s up to you.
Those are the five basic components to get you started.
Moving forward, you would need to make new spreads as needed (like next week you would need a new weekly spread, next month you will need a new monthly spread, and tomorrow you will need a new daily spread). It doesn’t take a whole lot of time to set up compared with how helpful it is. But, you can and should add other things that you want to as well.
Here are some things I have currently or have had in the past in my bullet journal. Feel free to add them to yours:
- a yearly overview: I can do a separate post on this at a later time
- a “currently reading” page where you keep track of the books you’re reading/have read
- a “currently watching” page which is the same thing as the reading one but with TV shows or movies instead
- schedules
- routines
- plans (like for a bonfire or movie night)
- memories of places or events or people that I don’t want to forget. This makes your journal kind of like a scrapbook but with words instead of pictures
In addition these, there are tons and tons of different things you could put in. The sky is the limit! I’m hoping to add a Favorite Bible verses page and Inspirational Quotes page in mine soon.
I hope this post helped you get your very own bullet journal started! Remember, you can adjust it any way you need to to make it work for you, and you can decorate it however you want. You will soon see how amazing it is to have a bullet journal to keep you organized – teen girl or not!